
What we're building today
What we're building today

Basic sign up form

Blank profile page after sign in
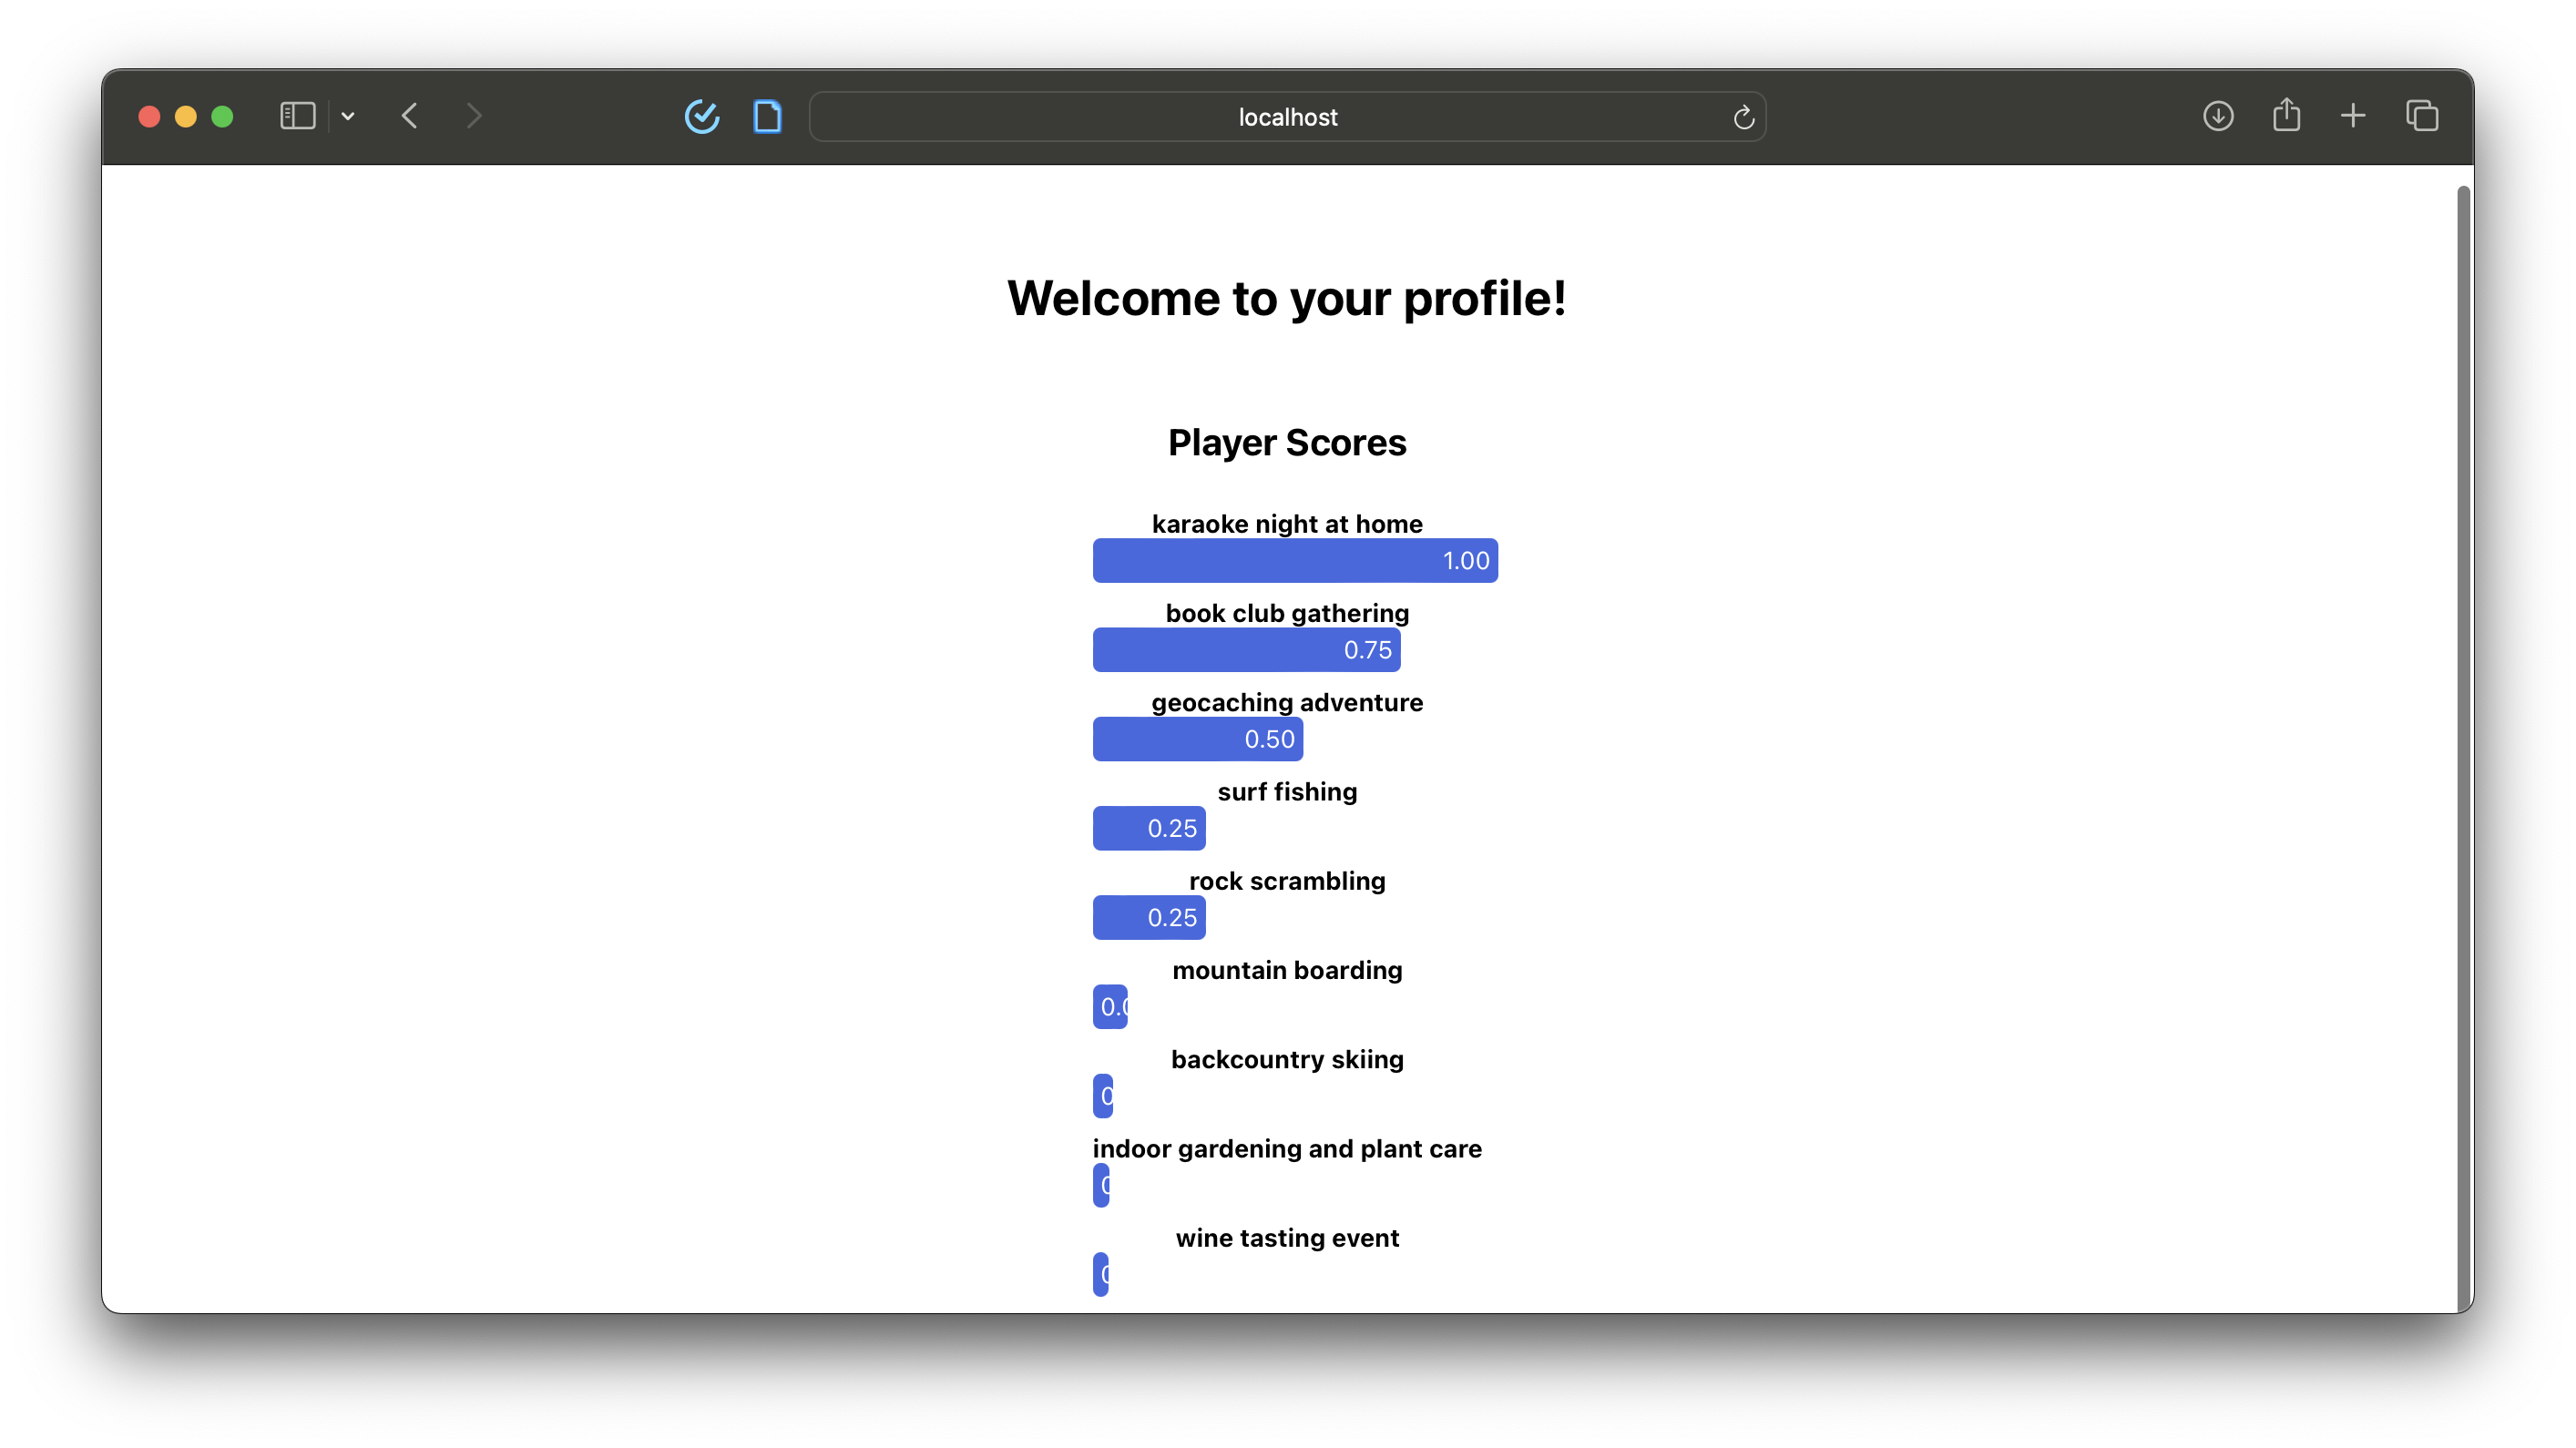
The profile page using data generated by playing 2bttns

You've successfully set up and launched your Console

Open your Console by going to localhost:3262/

Initial prompt when running 2bttns-cli admin create

After logging in, here's what you'll see:2bttns Console home page
Console > Settings > Apps

Clicking sign up bounces users out to 2bttns, then redirects them to profile
Creating game input data in your Console
Create a Tag under the Tags page by clicking shift + enter
Input game objects into games by first grouping them into Tags
Now our game is populated with data, and ready to go!
Full integration with 2bttns to generate profiles