Personalize profiles with 2bttns and Next.js

Adding 2bttns to your onboarding flow is the best option for gathering information before users arrive inside your app

We're going to implement 2bttns in the sign up flow of our app to generate rich user profiles with just two buttons.

What we're building today

Our example app

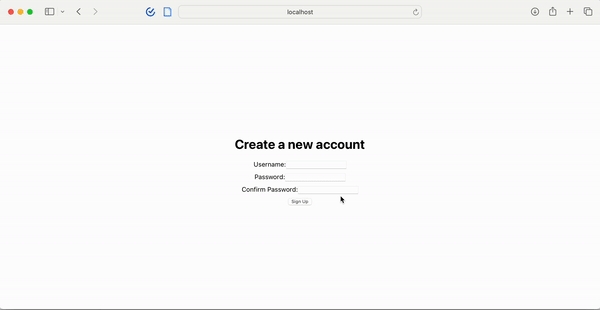
In this example, we have a React.js (React 16) client and a basic Express.js server. Here's what our app looks like right now:

Basic sign up form
Blank profile page after sign in

We have a simple sign in form that asks for a username and password. Once signed up, users can view their profile. We're going to use 2bttns to enrich the profile with details about the user's hobbies and interests.

Why use 2bttns?

In this example, we want to collect some information about their favorite hobbies and activities. Rather than building my own data collection component (and designing a good one), we can use 2bttns.

The profile page using data generated by playing 2bttns

Once everything is set up, I can have a whole personalization system configured and adjust various aspects from the results to the game's user experience through a no-code dashboard.

💭 Ideas galore: With these score we can make our profiles rich, personalized, and ready for content recommendations and personalized user experiences.


Set up Console

We'll need to set up the 2bttns Console. We're going to use the 2bttns CLI to spin up our Console.

If you'd like to play and test Games online, be sure to deploy your Console to a cloud environment.

Install the 2bttns-cli

To get started, you need to install the 2bttns command-line interface (CLI) in your development environment. Open your terminal and run:

npm install @2bttns/2bttns-cli

Using the CLI

With the CLI installed, you can now create a new console. Follow the steps to configure your Console with your DATABASE_URL. In your terminal, execute:

2bttns-cli new 
You've successfully set up and launched your Console

Behind the scenes, this will:

  • create a docker-compose.yml file in the current directory.

  • launch your Console,

  • apply migrations to your specified database,

  • seed the database with examples (optional)

You can place the Docker Compose YAML file anywhere. This Docker Compose file includes a PostgreSQL database container. Considering our React application lacks a configured database, we'll keep it.

💡 Helpful Tip: To avoid occupying your terminal window while running the container, include the --detach (or -d) flag like this:

docker-compose up -d

Your Console server logs will occupy your terminal when running docker-compose up without the --detach flag

We can also close our Console by running:

docker-compose down

4. Open your console should be running on localhost:3262

Open your Console by going to localhost:3262/

5. Now we'll create an admin account in our database using the 2bttns CLI inside our twobttns container so we can login to our Console.

docker-compose exec twobttns 2bttns-cli admin create

Initial prompt when running 2bttns-cli admin create

💡 Helpful Tip: 2bttns advises opting for the Username/Password authentication for its speed. We're going to create an account with a username "admin" and password "admin" to get going.

With the credentials you just created, log into the console. You can manage these credentials anytime from the Settings page in the Console.

After logging in, here's what you'll see:2bttns Console home page

Using the API

Now that your Console is running on localhost:3262, you can make API requests to localhost:3262/api. For a full guide on the 2bttns API, visit this page.

First, you'll need to generate a JWT bearer token to authenticate your API requests.

Generate JWT

get

Returns a JSON Web Token (JWT) you can use to authenticate API calls to 2bttns.

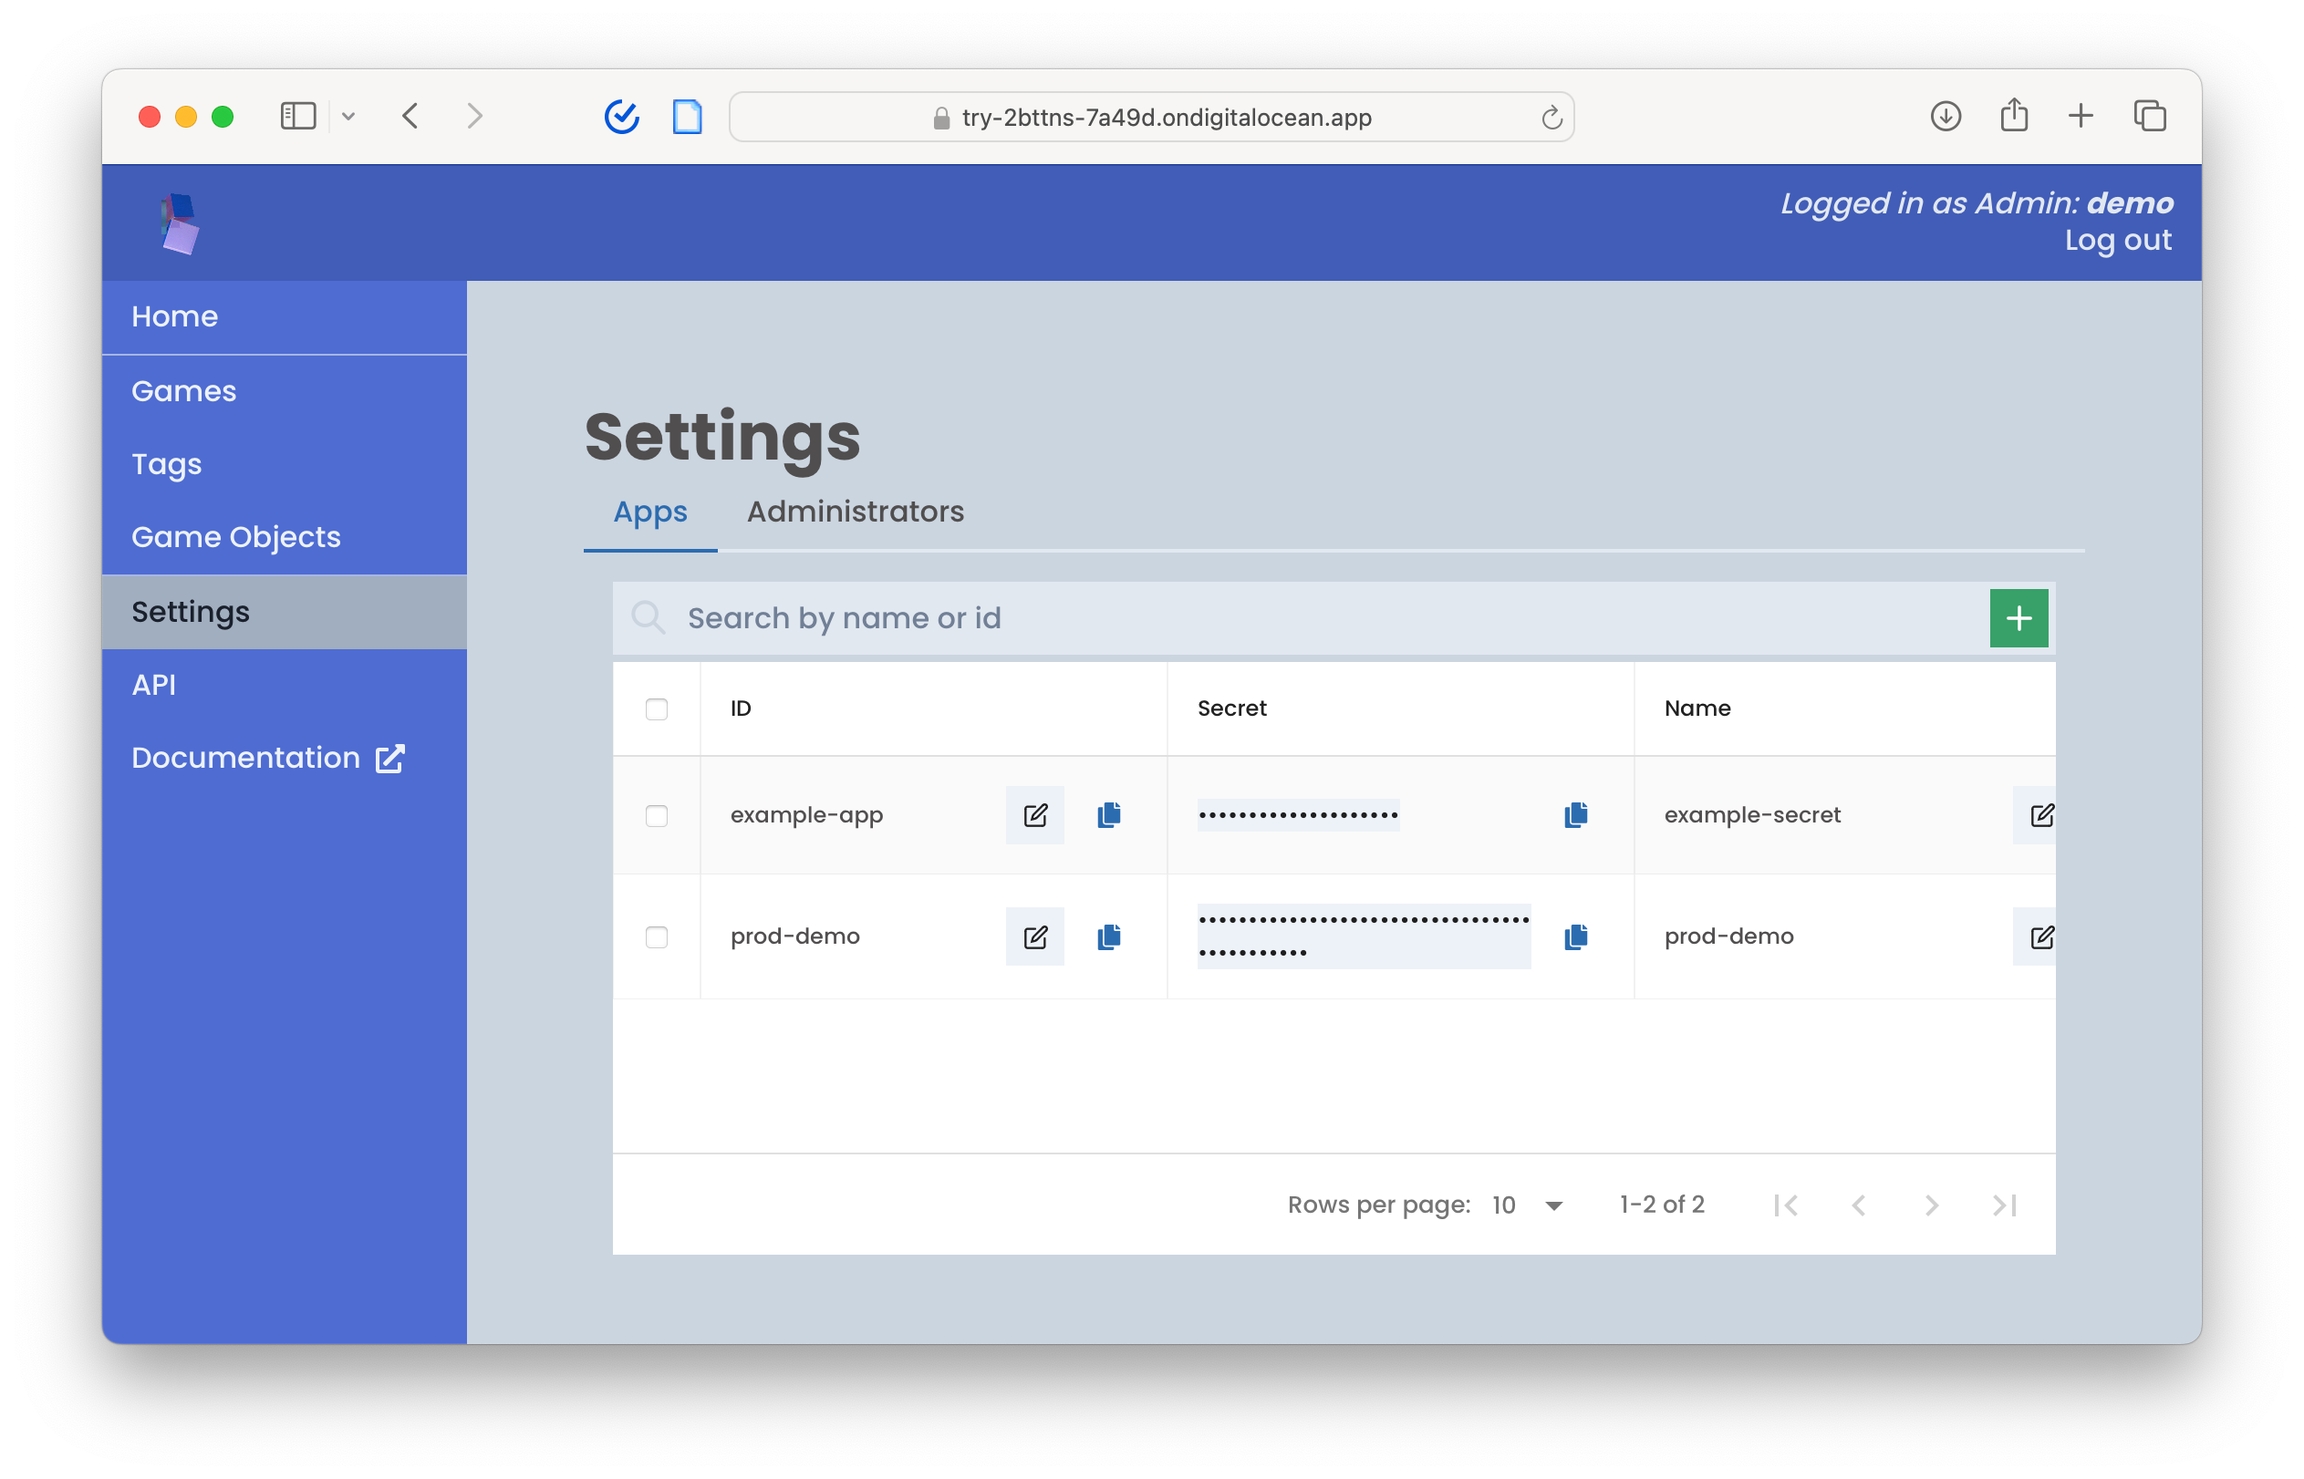
You can get the app_id and secret from your 2bttns admin console, under Settings/Apps.

Authorizations
Query parameters
app_idstringRequired
secretstringRequired
expires_instringOptional
Responses
200
Successful response
application/json
Responsestring
get
GET /api/authentication/token?app_id=text&secret=text HTTP/1.1
Host: 
Authorization: Bearer YOUR_SECRET_TOKEN
Accept: */*
text

2bttns will use your app_id and secret to your Console to generate a JWT. Navigate to your Console, click Settings, and make sure you're on the Apps tab.

Console > Settings > Apps

Here's an example fetch request:

Example fetch request
const fetch = require('node-fetch');

const url = 'http://localhost:3262';
const endpoint = '/api/authentication/token';
const params = {
    app_id: 'your-app-id',
    secret: 'your-secret-value' 
};

fetch(`${url+endpoint}?app_id=${params.app_id}&secret=${encodeURIComponent(params.secret)}`, {
    method: 'GET' 
})
.then(response => response.json())
.then(data => console.log(data))
.catch(error => console.error('Error:', error));

Generate URL to your Game: Now that you've generated your bearer token, you can use the full RESTful API within the Console.

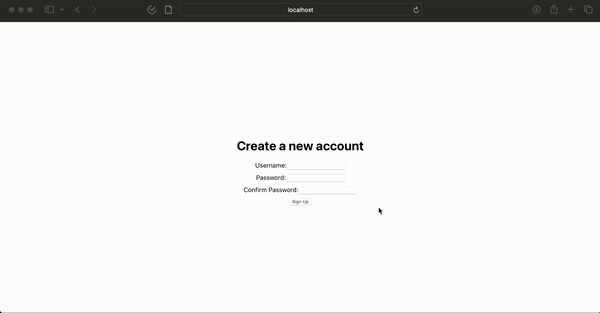
Let's generate a URL to our game in our frontend Sign Up button.

import React, { useState } from 'react';

function Signup() {
  const [username, setUsername] = useState('');
  const [password, setPassword] = useState('');
  const [confirmPassword, setConfirmPassword] = useState('');

  const getGameUrl = async () => {
    const queryParams = new URLSearchParams({
      app_id: 'example-app',
      secret: 'my-secret-value',
      game_id: 'hobbies-ranker',
      player_id: username, // assuming username is used as player_id
      callback_url: encodeURIComponent('http://localhost:3000/profile')
    });
    const requestUrl = `http://localhost:3262/api/authentication/generatePlayURL?${queryParams.toString()}`;

    try {
      const response = await fetch(requestUrl, {
          headers: {
            'Authorization': `Bearer ${process.env.BEARER_TOKEN}`
          }
        });
      const data = await response.json();
      if (data.gameUrl) {
        window.location.href = data.gameUrl; // Redirect
      } else {
        console.error('Game URL not found.');
      }
    } catch (error) {
      console.error('Failed to fetch game URL:', error);
    }
  };

  const handleSubmit = (e) => {
    e.preventDefault();
    if (password !== confirmPassword) {
      alert("Passwords don't match");
      return;
    }
    // Assuming signup logic is successful
    console.log('Submitting', { username, password });

    // Call getGameUrl to redirect user to their game instance
    getGameUrl();
  };

  return (
    <div style={{ display: 'flex', justifyContent: 'center', alignItems: 'center', height: '100vh', flexDirection: 'column' }}>
      <h1>Create a new account</h1>
      <form onSubmit={handleSubmit} style={{ display: 'flex', flexDirection: 'column', alignItems: 'center', gap: '10px' }}>
        <div>
          <label>Username:</label>
          <input type="text" value={username} onChange={(e) => setUsername(e.target.value)} required />
        </div>
        <div>
          <label>Password:</label>
          <input type="password" value={password} onChange={(e) => setPassword(e.target.value)} required />
        </div>
        <div>
          <label>Confirm Password:</label>
          <input type="password" value={confirmPassword} onChange={(e) => setConfirmPassword(e.target.value)} required />
        </div>
        <button type="submit">Sign Up</button>
      </form>
    </div>
  );
}

export default Signup;

Now, when users click Sign up, they'll be redirect to our newly created demo game. Let's try this out:

Clicking sign up bounces users out to 2bttns, then redirects them to profile

After completing a round 2bttns will redirect you to the specified callbackUrl parameter in the generatePlayUrl endpoint. Since we haven't loaded in any data, our game is empty. It's time to build out our game🕹️.

Create your game

We'll need to navigate to the Console and add input data (known as Game Objects) into our hobbies-ranker game we created earlier.

Adding inputs

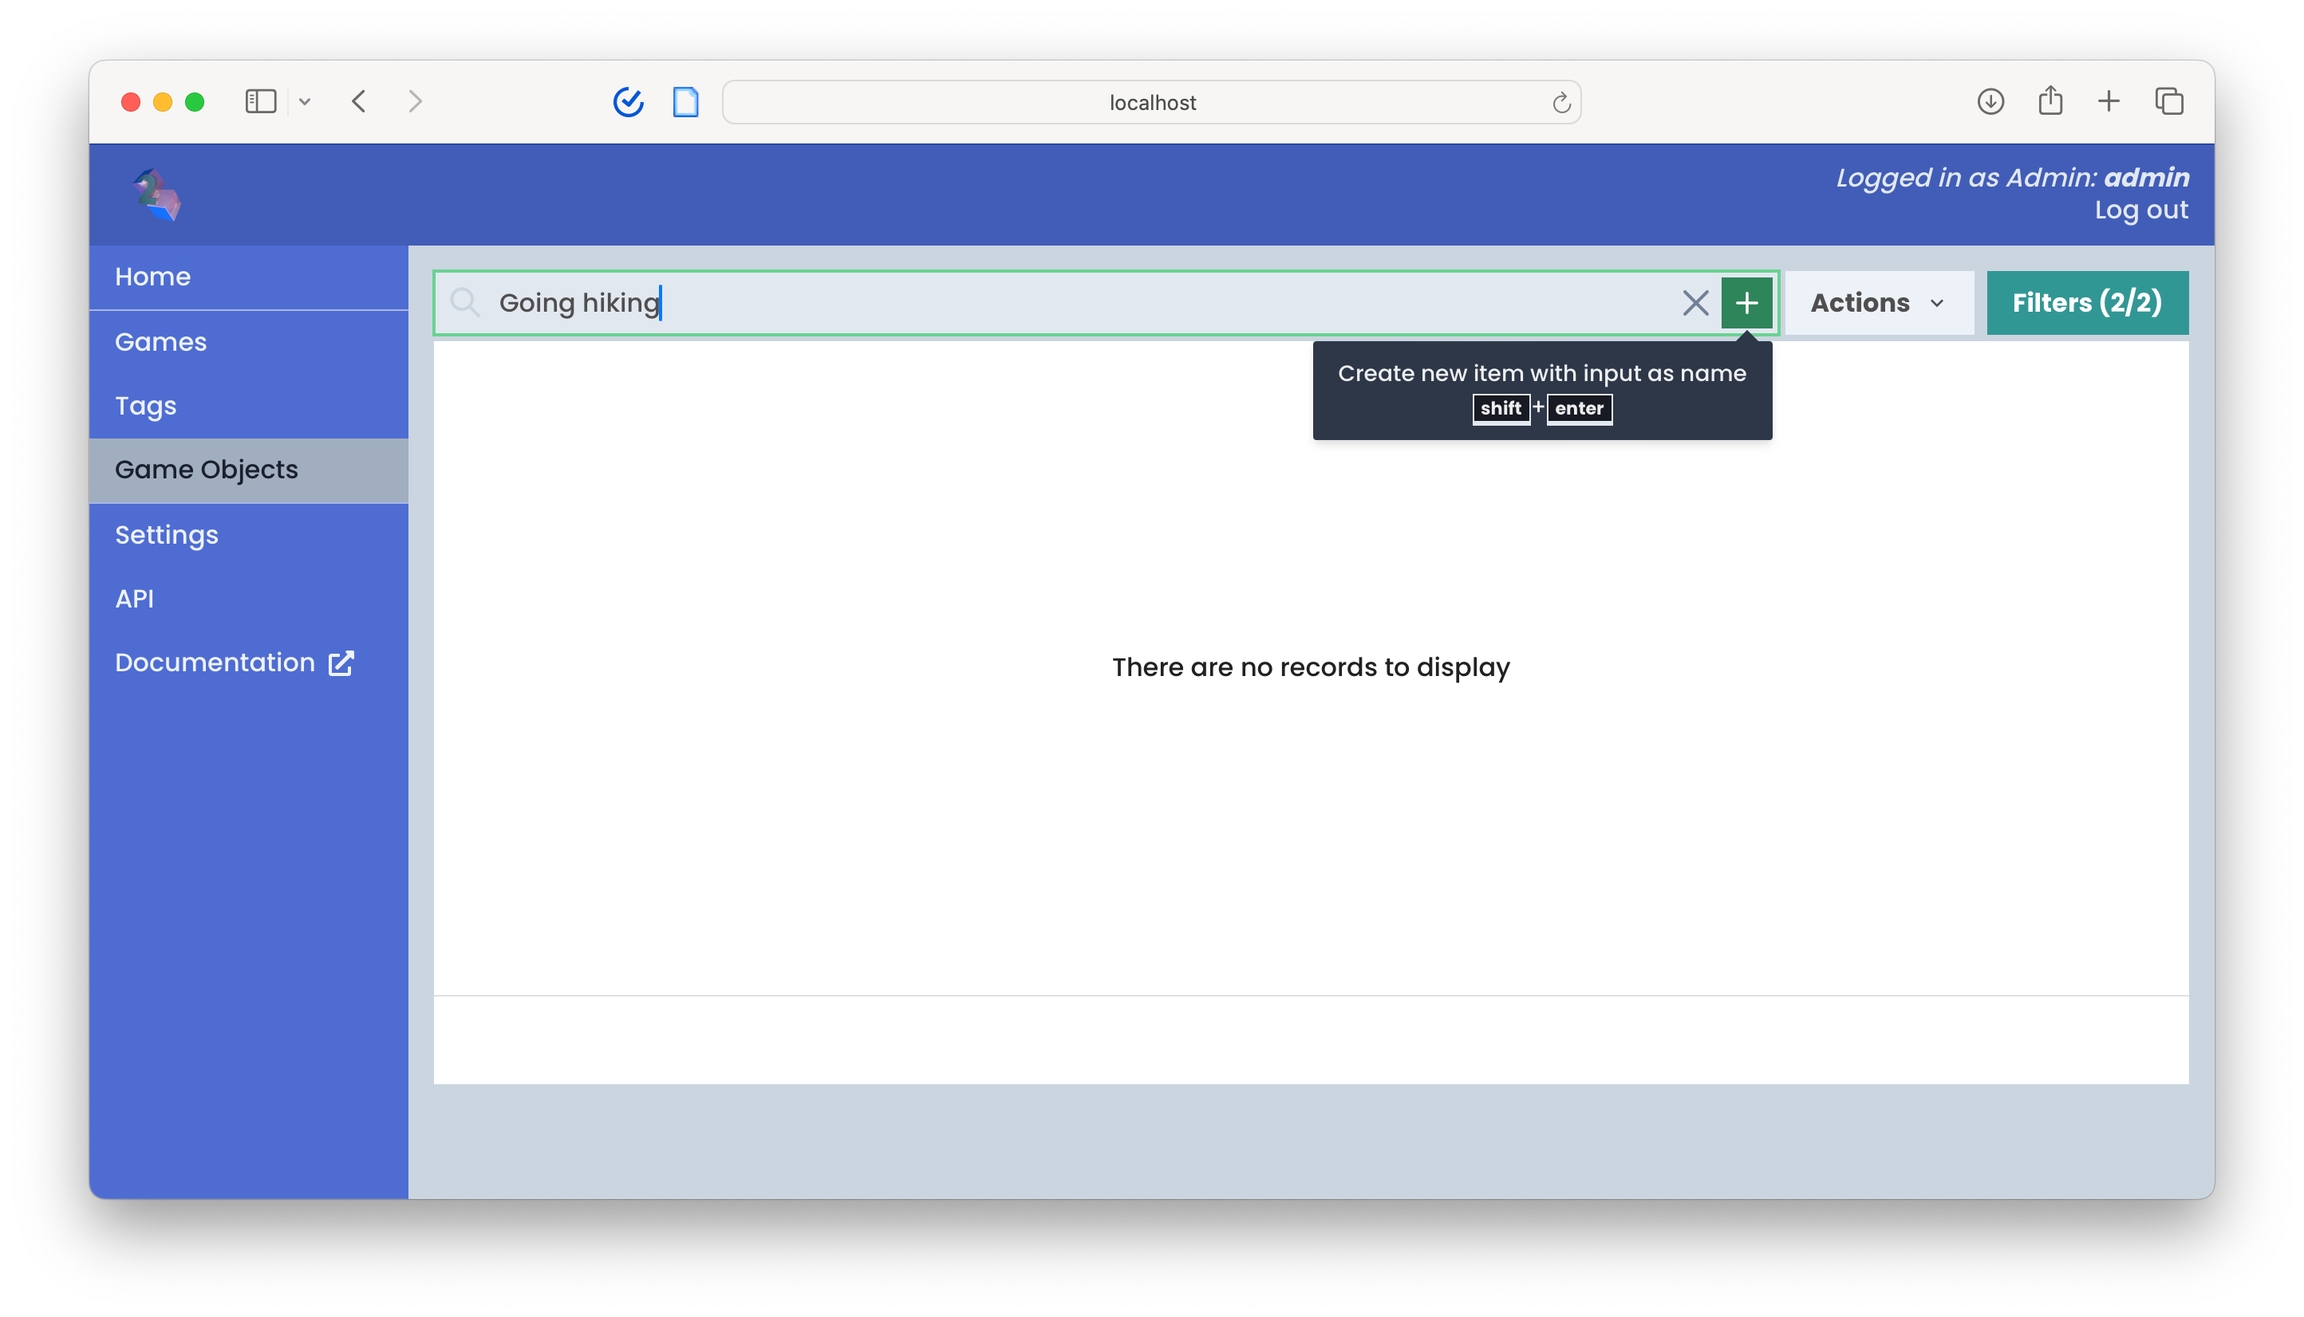
Since we're generating our profiles using hobbie data, let's see what we can come up with. Click on the Game Objects page and start adding game objects at the top:

Creating game input data in your Console

Let's add in a bunch more. In the future, we can upload JSON's directly through the Console or import data through the API.

Grouping inputs

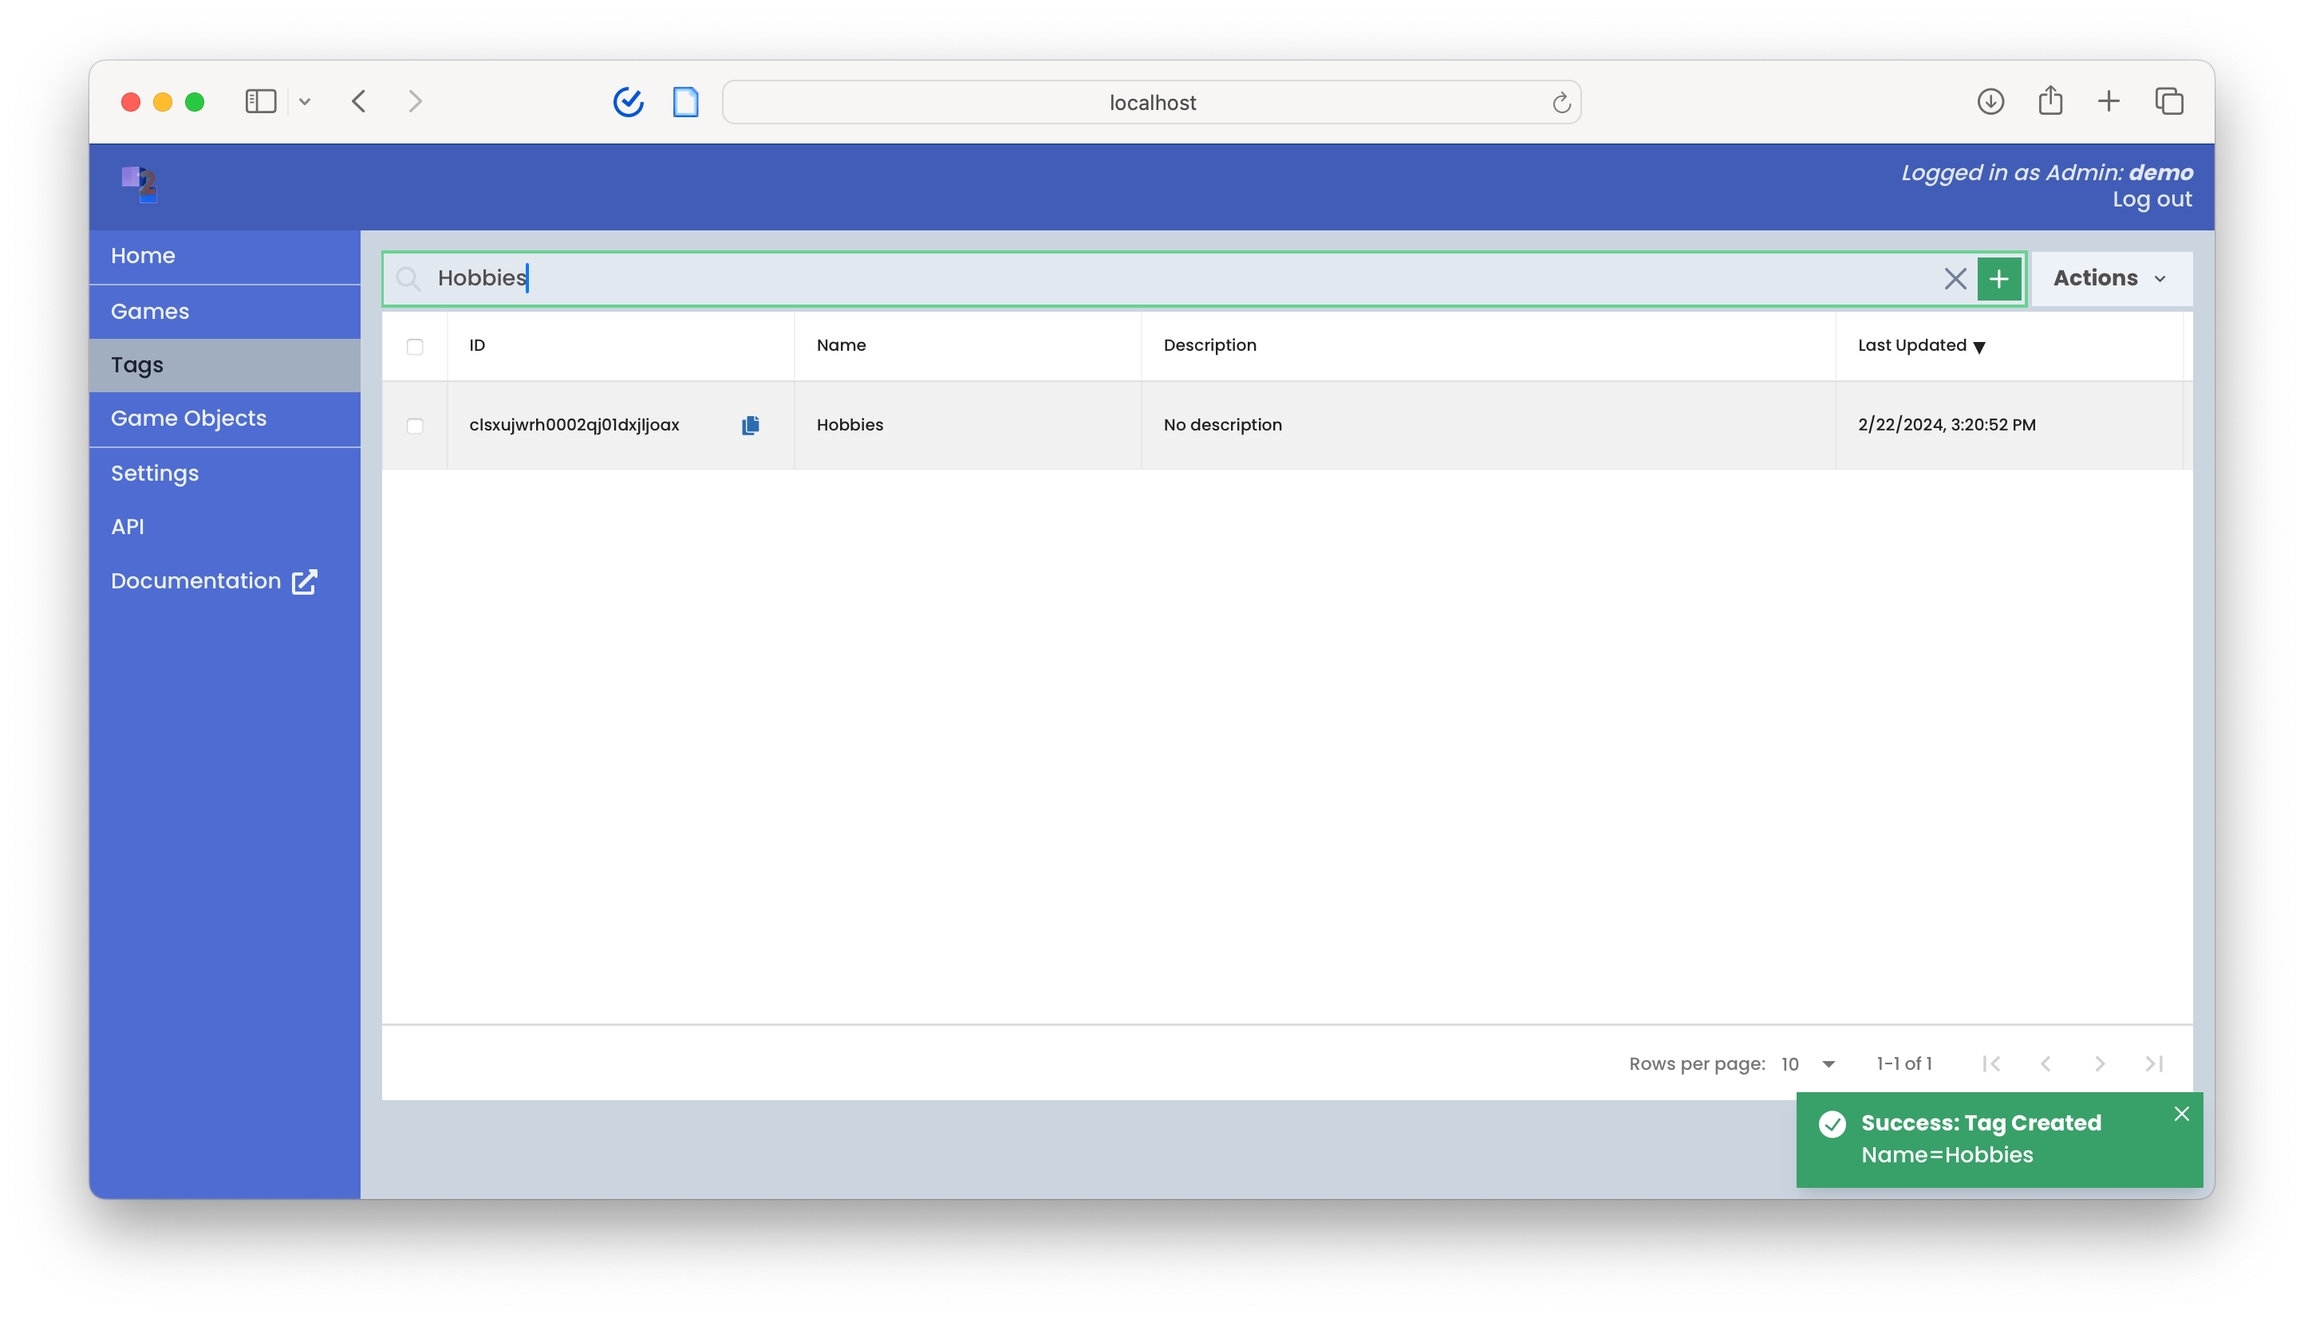
Next, we'll need to organize our Game Objects into Tags, which are collections of Game Objects. You can then load your Tags as inputs into games. Let's create a Hobbies tag under Tags page

Create a Tag under the Tags page by clicking shift + enter

Add data to game

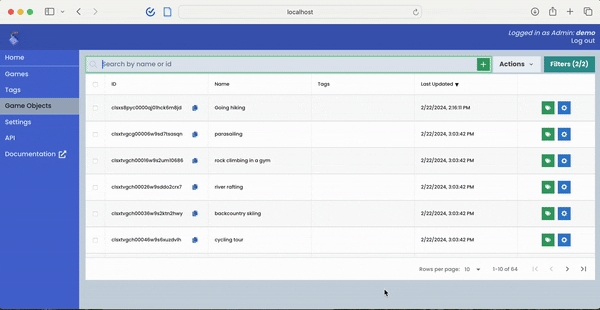
After creating our Tag, tag them by returning to the Game Objects page, bulk selecting, selecting the Hobbies tag, and then load them as inputs into our hobbies-ranker game.

Input game objects into games by first grouping them into Tags

To enhance the user experience by shortening the round length, please adjust the numItems parameter in your generatePlayUrl method within the API.

💡 Helpful Tip: Although the Console sets the default, your API call to generate a URL will override the round length.

Let's go back to our app and try signing in now.

Now our game is populated with data, and ready to go!

Retrieve and use results

Now let's retrieve the scores and display them on the profile page. Let's make a GET request in our API to retrieve the round results. We're going to use the /games/getPlayerScores endpoint:

Get Player Scores

get

Get a Player's score data for a specific Game.

Authorizations
Query parameters
game_idstringRequired

The game id to get scores for

Pattern: ^[a-zA-Z0-9_-]+$
player_idstringRequired

The player id to get scores for

Pattern: ^[a-zA-Z0-9_-]+$
include_game_objectsbooleanOptional

Whether to include game objects in the response

Default: false
Responses
200
Successful response
application/json
get
GET /api/games/getPlayerScores?game_id=text&player_id=text HTTP/1.1
Host: 
Authorization: Bearer YOUR_SECRET_TOKEN
Accept: */*
{
  "playerScores": [
    {
      "createdAt": "text",
      "updatedAt": "text",
      "score": 1,
      "playerId": "text",
      "gameObjectId": "text",
      "gameObject": {
        "id": "text",
        "createdAt": "text",
        "updatedAt": "text",
        "name": "text",
        "description": "text"
      }
    }
  ]
}
import React, { useState, useEffect } from 'react';

function PlayerScores({ player_id }) {
  const [scores, setScores] = useState(null);
  const [isLoading, setIsLoading] = useState(true);
  const [error, setError] = useState(null);

  useEffect(() => {
    const fetchScores = async () => {
      try {
        const response = await fetch(`http://localhost:3262/api/games/getPlayerScores?game_id=hobbies-ranker&player_id=${player_id}&include_game_objects=true`, {
          headers: {
            'Authorization': `Bearer ${process.env.BEARER_TOKEN}`
          }
        });
        if (!response.ok) {
          throw new Error('Network response was not ok');
        }
        const jsonResponse = await response.json();
        // Sort scores and then take the top 10
        const sortedScores = jsonResponse.scores
          .sort((a, b) => b.score - a.score)
          .slice(0, 10); // Take only the top 10 scores
        setScores(sortedScores);
      } catch (error) {
        setError(`Failed to fetch scores: ${error.message}`);
      } finally {
        setIsLoading(false);
      }
    };

    if (player_id) {
      fetchScores();
    } else {
      setIsLoading(false);
    }
  }, [player_id]); 

  if (isLoading) {
    return <div>Loading...</div>;
  }

  if (error) {
    return <div>Error: {error}</div>;
  }

  return (
    <div>
      <h2>Player Scores</h2>
      <div style={{ padding: '10px' }}>
        {scores && scores.length > 0 ? (
          scores.map((score, index) => (
            <div key={index} style={{ marginBottom: '10px' }}>
              <div style={{ fontWeight: 'bold' }}>{score.gameObject ? score.gameObject.name : 'Unknown Game'}</div>
              <div style={{
                width: `${(score.score / 1) * 100}%`, // Adjust if necessary based on score range
                backgroundColor: 'royalblue',
                color: 'white',
                textAlign: 'right',
                padding: '5px',
                borderRadius: '5px',
                maxWidth: '100%'
              }}>
                {score.score.toFixed(2)}
              </div>
            </div>
          ))
        ) : (
          <div>No scores available</div>
        )}
      </div>
    </div>
  );
}

export default PlayerScores;

All we have to do now is render this component in our Profile.js page:

Profile.js
import React from 'react';
import PlayerScores from './components/results/results.js'

function Profile() {

  return (
    <div style={{
      paddingTop: "75px",
      display: 'flex',
      justifyContent: 'center',
      alignItems: 'center',
      height: '100vh',
      width: '100vw', // Ensure the div takes full width
      position: 'fixed', // Keep the div fixed during scrolling
      top: '0', // Align to the top
      left: '0', // Align to the left
      flexDirection: 'column',
      textAlign: 'center',
      overflowY: 'scroll', // Enable scrolling within the div if content overflows
    }}>
      <h1>Welcome to your profile!</h1>
      <br/>
      <PlayerScores player_id={"some-player-id"} />
    </div>
  );
}

export default Profile;

Next Steps

Now when we play a game after signing up, our profile page should look like this:

Full integration with 2bttns to generate profiles

Next, you can use game scores to personalize your app experience, sort and rank content for feeds, curate marketplaces, and more.

Last updated

Was this helpful?