Quick Start

Create personalized content feeds, marketplaces, social networks, and more with just a few lines of code.

Prerequisites

Ensure you have the following installed in your environment:


Windows

  1. Ensure Docker Desktop is installed and configured with the WSL 2 backend. Follow the instructions here.

  2. Use a WSL terminal for the following commands. Open it using wsl.exe in your Windows Command Prompt/PowerShell.

  3. Once that's done, continue with the setup method below.


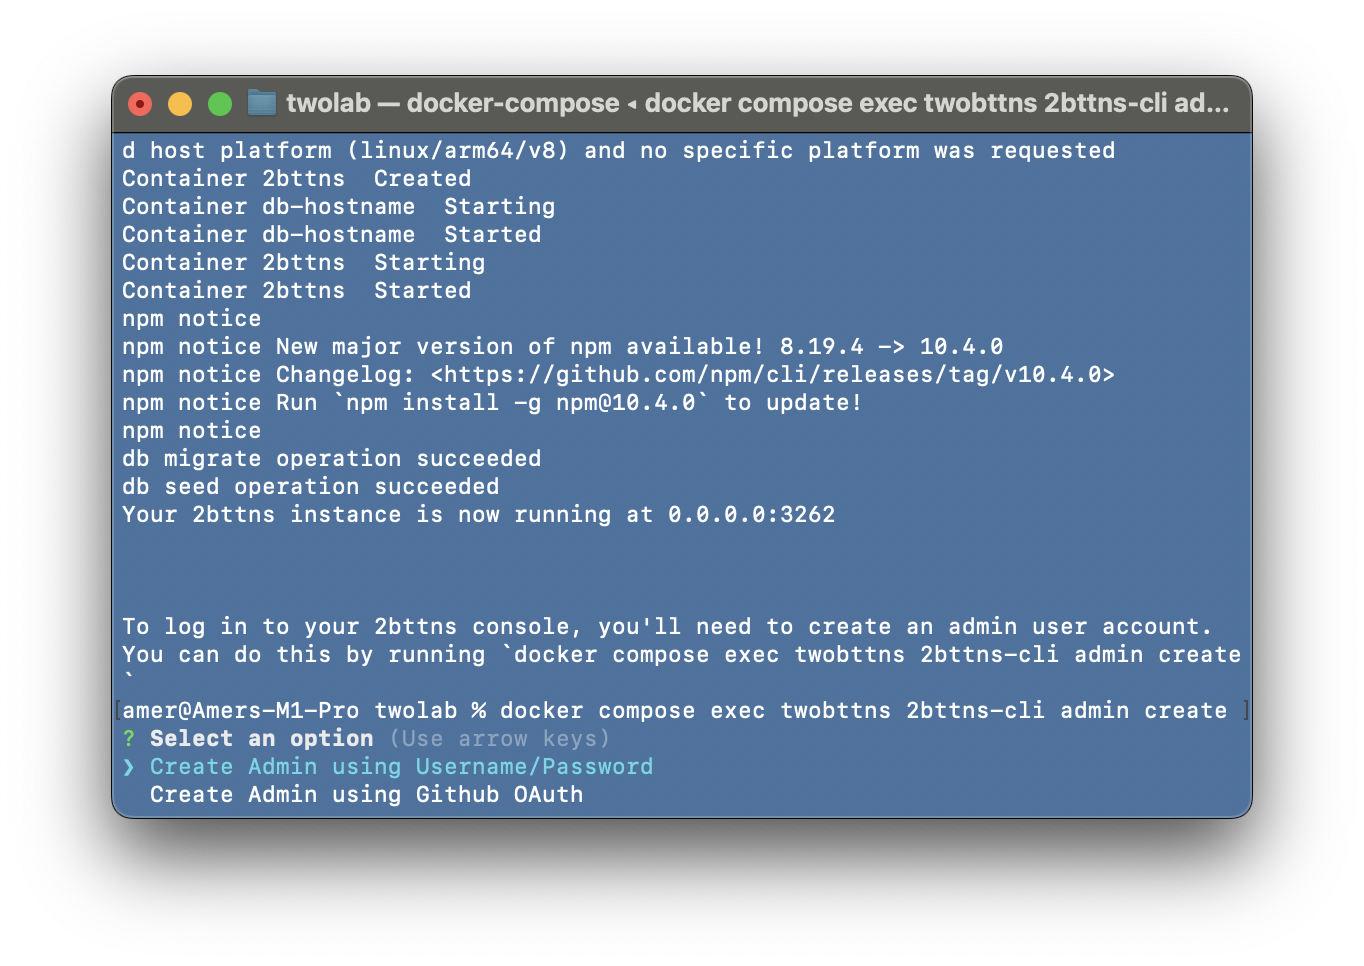
Step 1: Launch Console

If you want to test games in the cloud, it's best to start by putting your Console in the cloud.

2bttns is a containerized application, seamlessly running in the background through Docker.

When you launch 2bttns/2bttns, you gain access to the Console: a built-in admin panel for creating and hosting interactive games. The Console makes it easy to build one or multiple apps through one dashboard, allowing you to manage data, create games, and much more, all with just a couple of clicks. Follow these steps to quickly set up your development environment using 2bttns.

Create using new

With the CLI installed, you can now create a new console. Follow the steps to configure your Console with your DATABASE_URL. As of now, 2bttns exclusively supports PostgreSQL database.

In your terminal, execute:

2bttns-cli new

Behind the scenes, this will:

  • create a docker-compose.yml file in the current directory.

  • launch your Console,

  • apply migrations to your specified database,

  • seed the database with examples (optional)

Your Console is successfully set up and running behind the scenes using Docker.

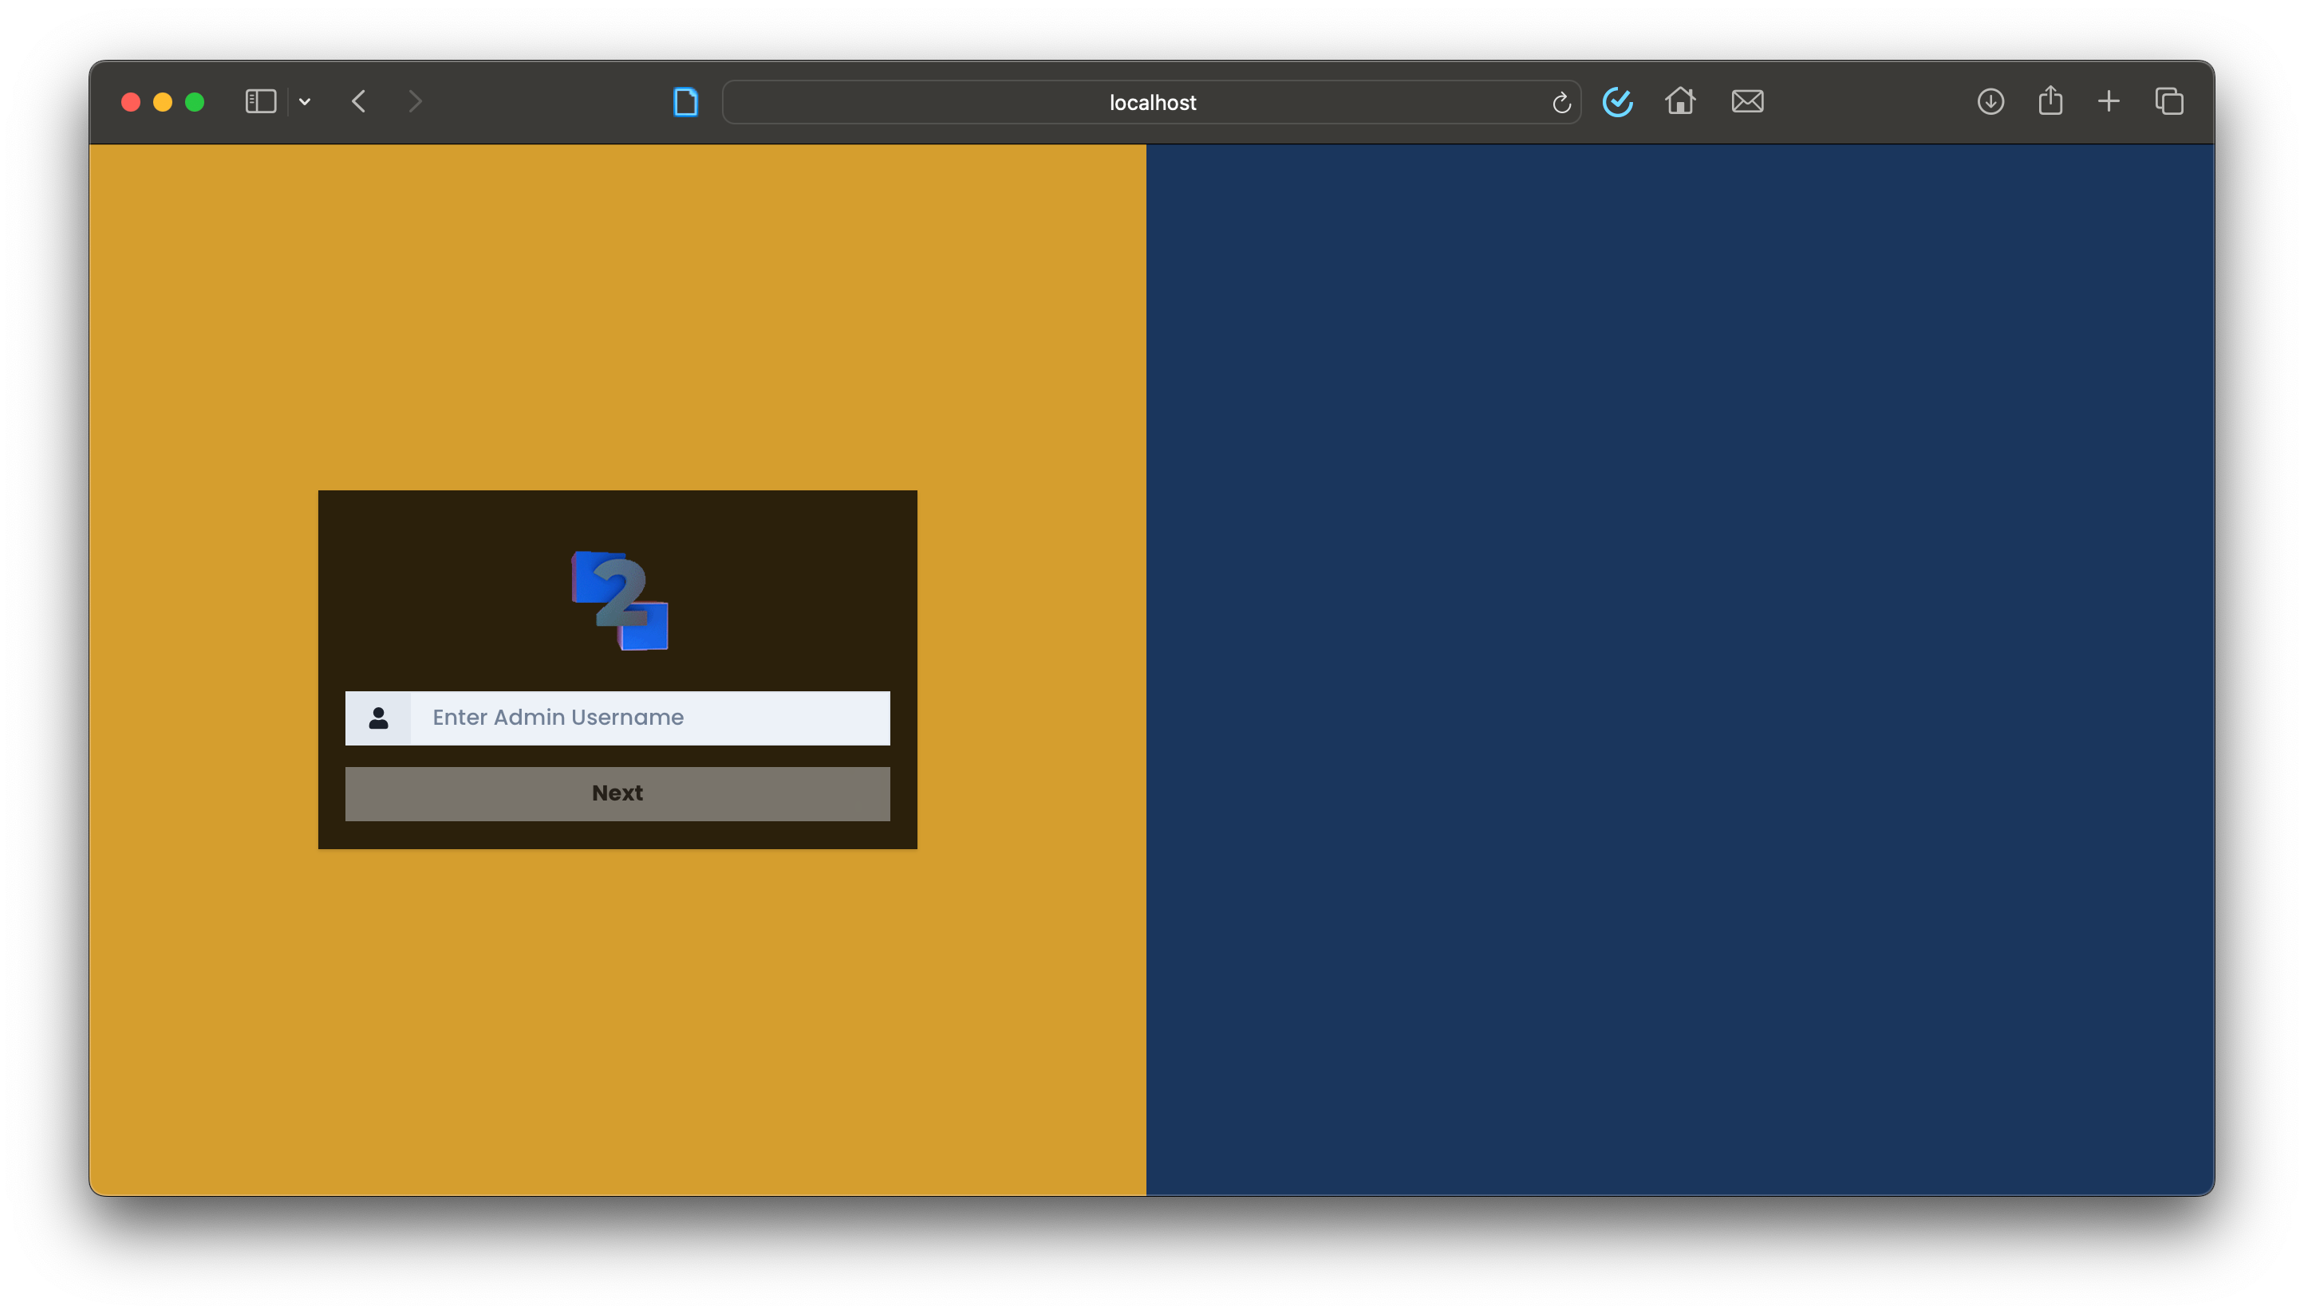
Create admin account

The next step involves setting up an admin account to access your Console securely.

Create an admin user via the 2bttns CLI (included in docker container)
docker compose exec twobttns 2bttns-cli admin create

💡Helpful Tip: We recommend using the Username/Password authentication method. You can achieve this through the following command, executed inside your container using the 2bttns-cli tool:

Open your Console at localhost:3262 and log in.

Clean Up

You can take down the containers using the following command in the same directory as the docker-compose.yml file:

docker-compose down

To start your 2bttns/2bttns container up again, run:

docker-compose up

Running the Container in the Background

To avoid occupying your terminal window while running the container, include the --detach (or -d) flag like this:

docker-compose up -d

Clearing Persisted Data

If you'd like to clear out the persisted data within your Postgres database without affecting the Docker Volume:

docker volume rm 2bttns-docker-compose_db-data

Environment Variables

You can always change these in your docker-compose.ymlfile at any time. These are the environment variables you can configure for your 2bttns admin console.

Variable Name
Description
Example

DATABASE_URL

The URL of the Postgres database to connect to.

postgresql://username:password@db-hostname:port/db

NEXTAUTH_SECRET

The secret used by NextAuth. You can generate a new secret on the command line with: openssl rand -base64 32

placeholder-secret-remember-to-change

NEXTAUTH_URL

The URL of the 2bttns app.

http://localhost:3262

GITHUB_ID

The GitHub OAuth app ID, if you want to allow admin users to sign in via GitHub.

1234567890

GITHUB_SECRET

The GitHub OAuth app secret that corresponds to your GITHUB_ID.

placeholder-secret-remember-to-change

The image comes pre-configured with a Postgres database for an immediate start with 2bttns. For those preferring their own database, 2bttns automatically sets up necessary schemas and tables when connected.


Step 2: Using the API

Now with your Console running, we can make fetch requests for everything.

  1. Generate a Bearer token to authenticate your fetch requests between your app and your Console.

Console > Settings > Apps

2bttns will use your app_id and secret to your Console to generate a JWT. Navigate to your Console, click Settings, and make sure you're on the Apps tab.

Generate JWT

get

Returns a JSON Web Token (JWT) you can use to authenticate API calls to 2bttns.

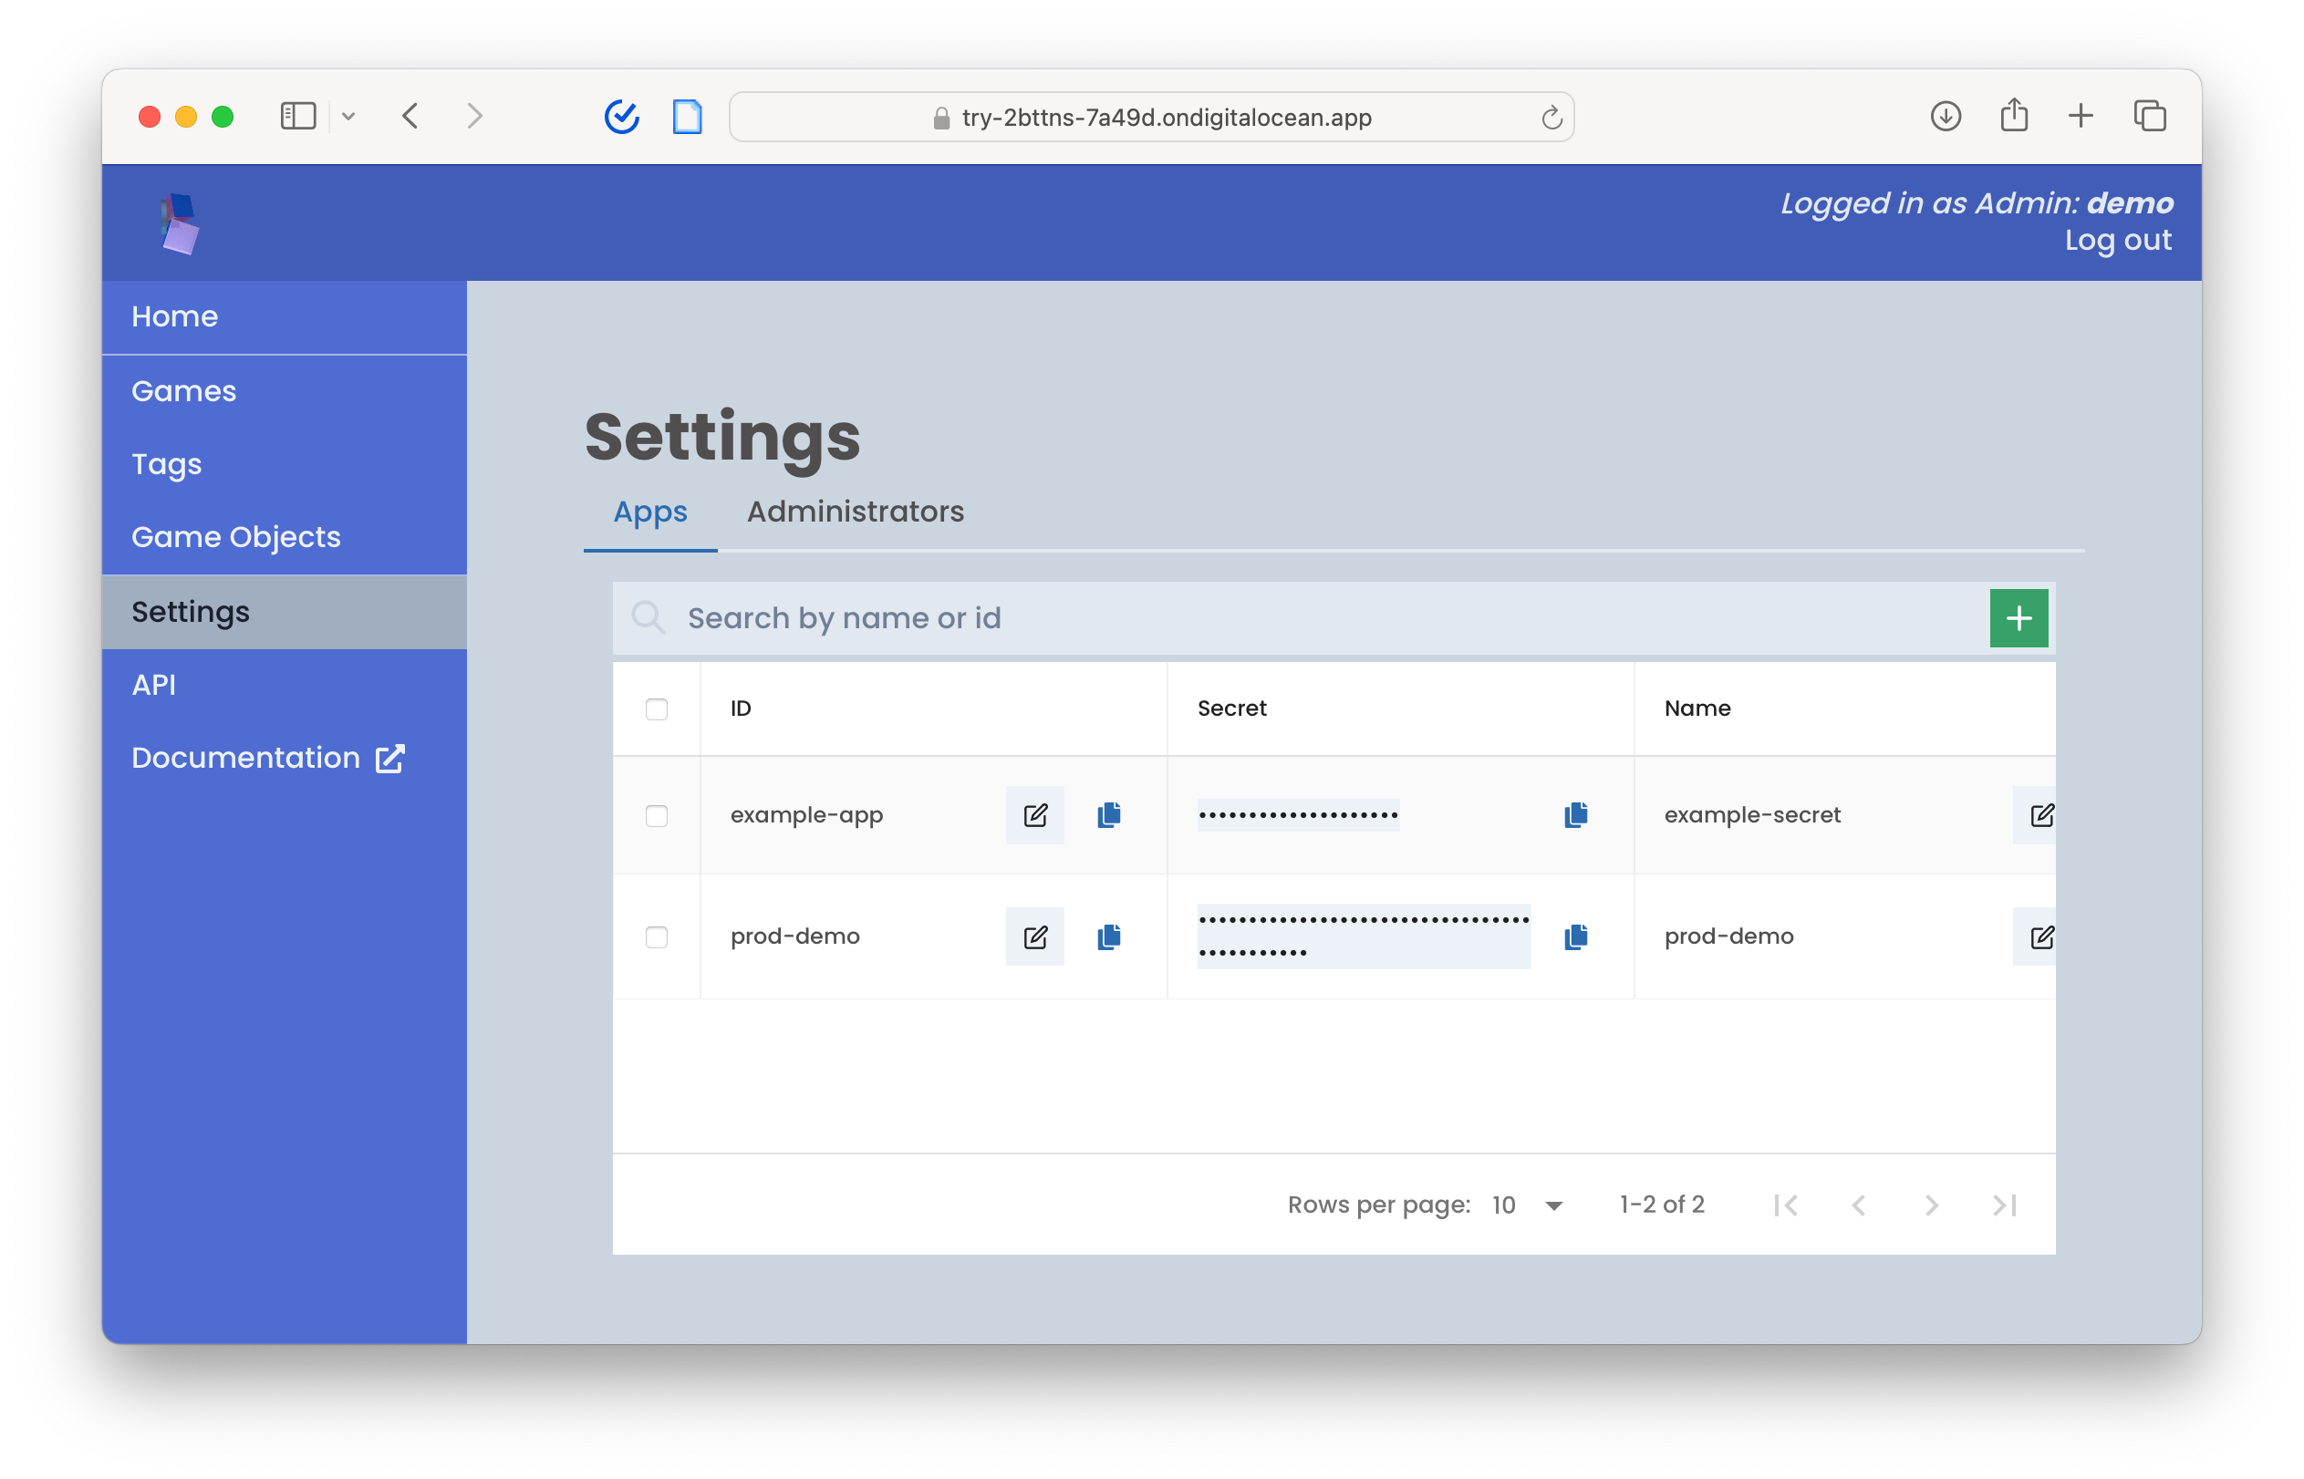
You can get the app_id and secret from your 2bttns admin console, under Settings/Apps.

Authorizations
Query parameters
app_idstringRequired
secretstringRequired
expires_instringOptional
Responses
200
Successful response
application/json
Responsestring
get
GET /api/authentication/token?app_id=text&secret=text HTTP/1.1
Host: 
Authorization: Bearer YOUR_SECRET_TOKEN
Accept: */*
text

Here's an example fetch request:

Example fetch request
const fetch = require('node-fetch');

const url = 'http://localhost:3262';
const endpoint = '/api/authentication/token';
const params = {
    app_id: 'your-app-id',
    secret: 'your-secret-value' 
};

fetch(`${url+endpoint}?app_id=${params.app_id}&secret=${encodeURIComponent(params.secret)}`, {
    method: 'GET' 
})
.then(response => response.json())
.then(data => console.log(data))
.catch(error => console.error('Error:', error));

2. Generate URL to your Game: Now that you've generated your bearer token, you can use the full RESTful API within the Console.

Generate play URL

get

Returns a URL you can use to send a user to play a game in 2bttns.

Authorizations
Query parameters
app_idstringRequired

ID of the app you've created in 2bttns

secretstringRequired

Secret of the app you've created in 2bttns

game_idstringRequired

ID of the game you want to play in 2bttns

player_idstringRequired

ID of the player you want to play in 2bttns. If the player doesn't already exist, it will be created.

num_itemsstringOptional
callback_urlstringOptional
expires_instringOptional
Responses
200
Successful response
application/json
Responsestring
get
GET /api/authentication/generatePlayURL?app_id=text&secret=text&game_id=text&player_id=text HTTP/1.1
Host: 
Authorization: Bearer YOUR_SECRET_TOKEN
Accept: */*
text

Here's an example where we generate a Play URL using node-fetch:

Example fetch request
let fetch;
(async () => {
    fetch = (await import('node-fetch')).default;

    const url = 'http://localhost:3262';
    const endpoint = '/api/authentication/generatePlayURL';
    const params = {
        app_id: "example-app", // Use environment variables as needed
        secret: "example-secret-value",
        game_id: "booksort",
        player_id: "a-user-id",
        callback_url: "https://www.example.com",
        num_items: 5 // num_items will override Round Length set in your Console
    };

    try {
        const response = await fetch(`${url + endpoint}?app_id=${params.app_id}&secret=${encodeURIComponent(params.secret)}&game_id=${params.game_id}&player_id=${params.player_id}&callback_url=${encodeURIComponent(params.callback_url)}`, {
            method: 'GET', 
            headers: {
                'Authorization': `Bearer ${BearerToken}` 
            }
        });
        const url = await response.json();
        console.log(url);
    } catch (error) {
        console.error('Error:', error);
    }
})();

Getting scored data: To retrieve scored data for a particular game and user, you can use the /api/games/getPlayerScores endpoint and pass in the game_id and player_id.

Get Player Scores

get

Get a Player's score data for a specific Game.

Authorizations
Query parameters
game_idstringRequired

The game id to get scores for

Pattern: ^[a-zA-Z0-9_-]+$
player_idstringRequired

The player id to get scores for

Pattern: ^[a-zA-Z0-9_-]+$
include_game_objectsbooleanOptional

Whether to include game objects in the response

Default: false
Responses
200
Successful response
application/json
get
GET /api/games/getPlayerScores?game_id=text&player_id=text HTTP/1.1
Host: 
Authorization: Bearer YOUR_SECRET_TOKEN
Accept: */*
{
  "playerScores": [
    {
      "createdAt": "text",
      "updatedAt": "text",
      "score": 1,
      "playerId": "text",
      "gameObjectId": "text",
      "gameObject": {
        "id": "text",
        "createdAt": "text",
        "updatedAt": "text",
        "name": "text",
        "description": "text"
      }
    }
  ]
}

You can also retrieve scored data for a particular, across all Game Objects and Games:

Get Ranked Results

get

Get ranked Game Object results for a player

Authorizations
Query parameters
playerIdstringRequired

ID value. Only alphanumeric, underscore, and hyphen are allowed.

Pattern: ^[a-zA-Z0-9_-]+$
inputTagsstringRequired

Specify comma-separated input tags that will be used to score the game objects associated with the output tag.

If the output tag is included in the input tags, the player's score for those game object will be used as base scores

outputTagstringRequired

Specify the output tag of the game objects to get ranked results for

Responses
200
Successful response
application/json
get
GET /api/game-objects/ranked?playerId=text&inputTags=text&outputTag=text HTTP/1.1
Host: 
Authorization: Bearer YOUR_SECRET_TOKEN
Accept: */*
{
  "scores": [
    {
      "gameObject": {
        "id": "text",
        "name": "text"
      },
      "score": 1
    }
  ]
}

You can use the API to generate games, manage data, and much more.

Next Steps

Last updated

Was this helpful?